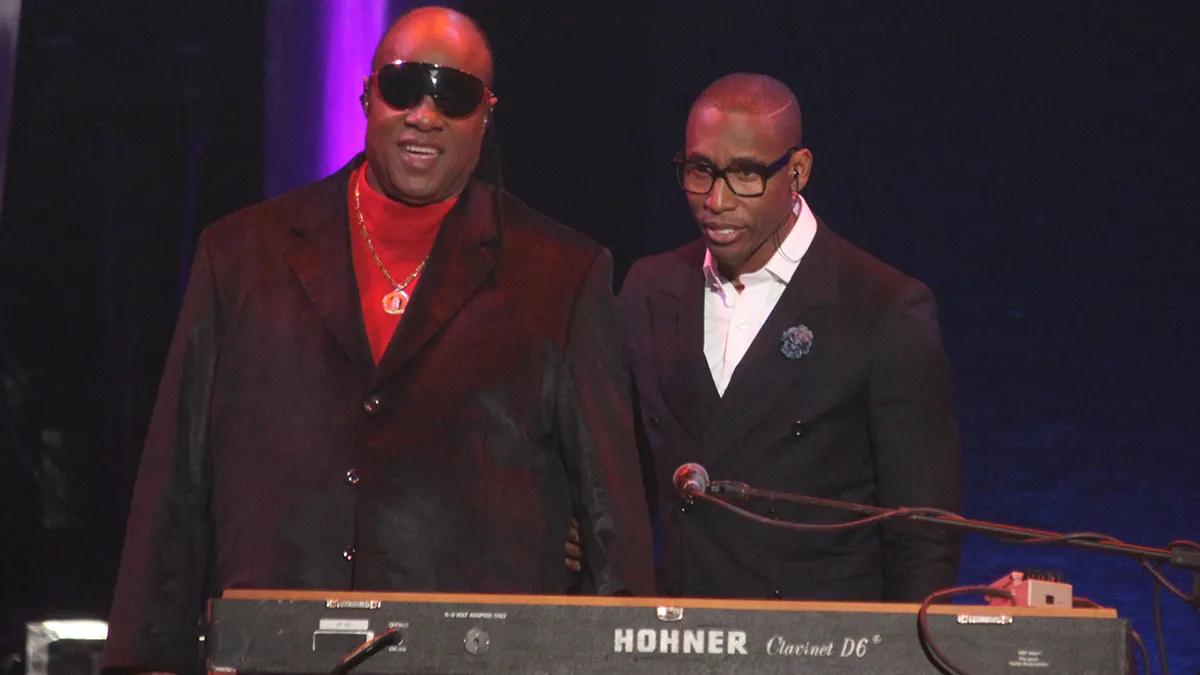
IT'S AMAZING WHAT YOU CAN DO WITH GUITAR RECORDING THESE DAYS. It’s not
just about sticking a mic in front of
an amp, but about plug-ins, pedals
that think they’re shrunken rack
units, affordable ribbon mics, small
amps that sound huge, mobile laptop
recording, hex outputs, and
much more.
In fact, if we changed the name of
the mag to “Guitar Recording,” we’d
have enough material to fill up at least
a year’s worth of issues. But for now,
we’ve squeezed as much as we can
into this month’s roundup.
In addition to reviews of five hot
new products, we’ve also solicited
the brainiacs at my Sound, Studio,
and Stage forum to reveal their
secrets on guitar recording—and
they came through with some pretty
amazing info (once you try Mike
Shelton’s Mid/Side recording technique,
you may never record guitars
the same way again). So tune up your
guitar—or if you have a Gibson Robot
Guitar, have it tune itself—plug in
some cables, grab your pick of
choice, and enjoy the latest scoop on
the art of recording guitars. (Note: All
prices are suggested list prices.)
TIP: Instead of doing my perspective of how the recording should be done, I ask the musician to get his sound. Then I start
setting up the mics—Shure SM57 next to the amp, off-axis, for the “bite” of the sound then 20 inches away, a large
condenser mic (M-Audio Solaris and Groove Tubes GT 67) for the added body. Love that Groove Tubes! I may add a third
mic as well, and I record all of them. Then, I send a straight DI to the computer and try some plug-ins to beef up the sound—Sans
Amp (Pro Tools) as a preamp, iZotope Trash for fine EQ/Compression settings and some distortion, then Eleven (Pro Tools).
On bass, it’s pretty much only a DI and plug-ins, with a compressor between the bass and the audio interface to
control the peaks if that’s part of the sound. —Gus Lozada
IK Multimedia
StealthPedal Deluxe
($449.99 Deluxe, $269.99 Standard)

IK Multimedia got an early start with amp sims, and now has
a very complete product line for guitarists with multiple
“powered by AmpliTube” stand-alone/plug-in software programs,
as well as hardware (like the outstanding I/O Stomp
foot controller). StealthPedal, a Mac/Windows USB interface
built into an extremely sturdy, all-metal expression pedal, is
the latest addition to the roster.
INTERFACING
Two hi-Z/line audio inputs accommodate stereo instruments
like Chapman Stick, or a guitar and (mono) drum machine
output. However, stereo isn’t preserved through AmpliTube’s
mono signal chain, so this feature is most relevant with host
software, or for switching between two instruments
onstage. There’s a 1/4" input jack for an additional expression
pedal, and another jack for connecting up to two
footswitches. Although StealthPedal is designed to control
the bundled software from IK, there’s a useful generalpurpose
MIDI controller application that can assign the
pedal/footswitch and remote switches/additional expression
pedal to different MIDI channels, controllers, ranges, etc.
This takes StealthPedal beyond being an “IK-only” product.
Audio outs consist of stereo balanced/unbalanced outs
and headphone output (all audio connections are 1/4" jacks,
except the 1/8" headphone jack). There’s also a USB connection,
and three status LEDs (status and with AmpliTube,
Level, and Tuner). Resolution is 24-bit, up to 48kHz.
THE SOFTWARE
The Deluxe version includes AmpliTube 2 and Ampeg SVX;
given their cost and the pedal price, that’s a good deal. The
standard version includes AmpliTube 2 Live and Ampeg SVX
Uno (“lite” versions with an upgrade path). Both versions
include Riffworks’ T4 recording software and AmpliTube
X-Gear—a “shell” for IK products that lets you mix and
match modules from the various AmpliTube-based
programs (e.g., use an amp from AmpliTube Jimi Hendrix,
with a cab from AmpliTube Fender).
IN USE
After installing the Windows drivers (the Mac doesn’t
need drivers), I was up and running. The audio quality is
on the same level as the pedal’s excellent build quality.
Tested as an audio interface for Ableton Live, the roundtrip
latency for reliable operation was around 15ms (most
programs measure only input latency, and would report it
as being 7ms).
Tying the pedal to parameters is easy, as X-Gear
incorporates a window where you can assign the
pedal and footswitch, as well as the external
footswitches/pedal, to particular parameters (as well as
set ranges). You can control different parameters in different
presets, but you can’t control two parameters at
the same time from the pedal unless you use StealthPedal
as a MIDI pedal, and set up control via X-Gear’s MIDI
Control option.
Finally, in case you’re not familiar with AmpliTube itself,
I’m a big fan of how it sounds. Every amp sim is different,
but AmpliTube has the “clean transition to overdrive” thing
down, allowing it to get subtly crunchy tones as well as
clean sounds and full-out distortion.
CONCLUSIONS
StealthPedal seems intended for live performance (just add
a laptop), but also provides a high-quality interface for guitar
in the studio—the icing on the cake is MIDI control possibilities
for non-IK devices. I really didn’t know quite what to
expect when this showed up for review, but I’m definitely
impressed.
Strengths: Built like a tank. Integrates smoothly with Ampli-Tube X-Gear. Stereo I/O for studio applications. Excellent
sound quality. Accommodates additional pedals and
footswitches.
Limitations: No mic input for studio use. Pedal can only
control one parameter at a time in X-Gear unless used as a
MIDI pedal.
I try to get as many feeds as I can—direct from the guitar, direct from the effects pedals (stereo if possible), closemiked
amp, and distance-miked amp. Who knows—the sound you want might just be one of them, or all of them. And
use new strings for a bright, clean sound. —John Sayers
For fat power chords or rich distorted sounds with an open-back cab, mic both the front and rear of the cone, record
two tracks, and reverse phase on one of them. Pan them oppositely for broadness (good on rhythm parts) or centered
for a focused thickness (better for solos).
I’m currently using a DSP amp emulator I designed for my Sonic Core SCOPE system [Alfonso designed Adern’s
Mojo amp sim —Ed.]. With amp sims, monitor the processed sound while you record the dry guitar sound. Apply the
amp emulation on the recorded sound, because as the song progresses, you might want to tweak the amp sound differently.
—Alfonso D’Amora
If you get a great sound coming from a nice tube amp, you can almost throw an SM57 randomly a foot in front of the
amp and end up with an extremely good sound. If you are going for something other than traditional guitar sounds,
that’s another matter.
Also, people often overlook the creative power of a few pedals. A modest collection of pedals that you can
tweak and re-sequence often provides a wider palette of cool sounds than some of the more advanced DSP
options. —Ronan Chris Murphy
Native Instruments Guitar Rig Mobile ($119)

With more musicians recording on laptops, several companies
have introduced mobile-oriented products—including
Native Instruments, a veteran of guitar-oriented software and
hardware. Guitar Rig Mobile follows up NI’s Guitar Rig Session,
which is about twice the price and includes more I/O (for
my review of Session, check out www.harmony-central.com/
articles/reviews/ni guitar rig session/ ).
INTERFACING
The Mobile interface box is tiny—about the size of a pack of
cigarettes—weighs only 3.2 ounces, and would fit in any laptop
bag. Despite the low price, the package is complete:
software, USB cable, Quick Start guide, and a one-pager
on getting up and running with Windows XP/Vista or
Mac OS X. It doesn’t get much simpler than that.
I/O includes a 1/4" input jack, 1/4" stereo output jack (for
headphones or driving a mixer, active monitors, etc.), USB
connector, and side level controls for input level and output
level. Two LEDs indicate input signal present and USB connected.
Done!
THE SOFTWARE
You get drivers, and Guitar Rig 3 LE (VST, RTAS, AU). As a
confirmed Guitar Rig 3 user, LE is limiting compared to the
full version; it’s kind of like going into a gourmet restaurant
and only having the soup. Sure, the soup is good, but the
entrée is something else altogether.
That said, you get two guitar amps (a “Marshall” and a
“Twin Reverb”), bass amp, and 12 effects: reverb, delay, chorus/
flanger, phaser, two distortion boxes, auto filter, wah,
graphic EQ, volume adjustment pedal, noise gate, and compressor.
Two digital recorder modules can feed signals into
Guitar Rig 3 LE or record your playing; for example, when
tweaking a preset, you can record a riff and play it back while
you tweak, and it’s easy to grab an idea when inspiration
strikes. As expected, there’s also a metronome and tuner.
IN USE
The converters offer resolution up to 24-bit/192kHz. As
someone who feels 96kHz sample rates really do make a
difference with amp sims, I’m glad to see that option—especially
because a modern laptop running a stand-alone app
can handle 96kHz without problems. As to 192kHz, I could
care less but as the Cirrus Logic converters (also used in the
Rig Kontrol 3) run at that rate, I’m sure NI saw no downside
to making that option available.
Installation is the usual deal of installing Windows drivers
(props for accommodating 64-bit Vista), or just plugging
into a Mac. You do need to go through NI’s Service Center
to register Guitar Rig 3 LE; this may seem inconvenient, but
I’ve come to appreciate how it informs me of updates and
allows easy authorization management.
CONCLUSIONS
Guitar Rig Mobile works for studio or stage. Some people
even run Guitar Rig on a netbook, which sure beats carrying
around a pedalboard and amp—just plug the Mobile I/O output
into a mixer or PA system.
It’s likely you’ll tire of Guitar Rig LE 3 after a while;
although you can upgrade to the full version for $289, the
price-conscious may find upgrading to Guitar Rig 3 XE
attractive—the $59 upgrade fee gets you six amps and 21
effects (interestingly, the ones I tend to use the most often).
It’s a really good deal.
Overall, NI hits the target with Guitar Rig Mobile. For under a
hundred bucks street you get convenience, sound quality, and
enough software to get you started (and for some, it will be all
they need). That’s a tough price/performance ratio to beat.
Strengths: Super-portable. Quality audio. Goes up to 192kHz
sampling rate. Includes useful software, with upgrade path.
Limitations: Plastic case, not metal.
A lot of classic guitar recordings were done on analog tape—and the preamp matters a lot too, especially with an SM57,
and even more especially if the amp is loud—the pres need enough headroom to take the higher levels. Imagination
doesn’t hurt, either: Keith Richards recorded a couple of tracks on Sticky Fingers with a Fender Champ stuck inside a
toilet. Muscle Shoals studio was remodeling their restroom, and the old toilet was sitting outside the door. Keith was
getting frustrated moving his amp and mics around and still not getting the sound he wanted, so he stuck it in the toilet
and that worked.
I’ve certainly done the “stick an SM57 in front of a great tube amp and let it roll” thing enough times, but I can’t say I
always get the best possible sound that way. My preferred technique is to use a dynamic mic just off the speaker, and
at a slight angle, whether it’s the SM57 or a Beyer M88 or a Heil PR30 (these days it’s usually one of the last two). Then
I place a second mic, usually a large diaphragm condenser mic, between 1 and 3 feet off the amp. Move ’em around till
they sound good. —Lee Flier
Use a looper pedal, re-amp box, or Line 6 BackTrack to play a pre-recorded guitar loop through the amp while you
move the mic. —Fabian Smith
When recording guitar amps, I use what I call “Split M/S,” basically a modified M/S (Mid/Side) setup. I place a cardioid
mic close on the grill doing the typical voodoo—edge of cone vs. voice coil, angled vs. straight on, etc.—whatever it
takes. Then, I use a Figure-8 mic a few feet back in the room, with the null pointed at the amp. Treat the two mics as an
M/S pair, and decode to stereo. The distance imparts a bit of “pre-delay” that allows the direct sound to hit first, which
makes the room sound seem even bigger.
I’ve placed the Figure-8 mic as far away as 7–10 feet in a few great-sounding big rooms. Sometimes I use the same
mics (AKG 414s work nicely, Royer 121s can be really warm), other times I’ve used different mics.
When double-tracking with this technique, move the Figure-8 mic around in the room to get different reflections. Or,
move the whole setup around in the room. For the rougher Keith-y type parts, move the Figure-8 mic closer and don’t
use as much in the track.
For some variations, try placing the amp a few feet from a wall, firing along the wall. Say you’re looking at the
amp and the wall is on the right: Set up the Figure-8 mic so the null faces the amp, and one side faces the wall a
few feet away. That’s your “Right” track. Next, move the setup so there’s a wall on the left, and there’s your “Left”
track. Now put up the stereo tracks for a real stereo vibe. Also, for some fun textures try compressing the Figure-8
or cardioid mic differently before decoding: Squash the close mic/expand the side, expand the close/squash the
side, etc. These techniques work really well when re-amping, and also with bass that has a lot of high frequency
info like slap bass. Just roll up the HPF on the side mic to about 600–800Hz so you don’t mess with the bottom
end’s phase integrity. —Mike Shelton
I use two mics, one bright (like a condenser—Neumann U67, Shure KSM44, Røde NTK) and one dull/soft—like a ribbon
(AEA R84 or R92, Royer 121, etc.). Make sure the diaphragms, not just the front of the mics, are the same distance from
the source. Blend to taste with a room mike as well. More tips:
· Use two amps.
· Do double and triple takes with the same or different EQ on the amp. Turn off the reverb for this.
· Try different picks—they sound different.
· When overdubbing, listen to the sound you’re recording way down in the mix to make sure it works with the other
sounds that are already present. —Halljams
I like smaller, lower-wattage amps. They saturate earlier, allowing you to get “that” sound at lower volumes, without
“over-exciting” the room and creating unwanted resonances/rattles (or upsetting the neighbors). I frequently place a
dynamic cardioid mic up close (the Heil PR30 is my new favorite mic for this), and a large-diaphragm condenser several
feet away as the distance mic (e.g., Lawson L251).
Because I record in a room that sounds terrible, I surround the distance mic with RealTraps MiniTraps acoustic treatment
panels, which take a lot of the poor-sounding reflections out of the mic while allowing me to record far away from
the amp. With these panels, I can record with the distance mic in omni for a gorgeous, full sound. This also works with
acoustic guitar; with the panels, I can record the acoustic guitar about 2 or 3 feet back in omni, and it sounds beautiful.
I’ll typically aim the Lawson L251 at where the body meets the guitar’s neck.
Regarding bass, several years ago I was going to record a bass player who always got a fantastic tone both live and
in the studio, so I was curious to see what he was using. He walked in with a Fender P-bass and a tiny Roland Bass
Cube 30. That was it. I used an Audio-Technica AT4060 through a Peavey VMP-2 tube mic preamp, and it sounded gorgeous
and warm. Sometimes small amps can be shockingly good for bass.
One last tip: Aim your amp into odd-sounding places, such as floor heaters, showers, staircases, open dryers, metal
trash cans, etc. Place the mic inside the odd place (in the floor heater looking up, inside the shower, down at the bottom
of the stairs of a staircase, inside the open dryer, etc.). No plug-in or effect can touch this. —Ken Lee
There are alternatives to the standard SM57; I’ve gotten better results from the Audix i5 and Sennheiser MD 421. Also,
it’s worth mentioning that most DAWs have a “loop recording” function that lets you loop a section of a song and then
record multiple takes without needing to hit record again. This is a great feature for recording another player, it helps
keep them focused because you can minimize distractions from the recording process. —Mike 064 Freeman
Line 6 POD Farm (from free to $299; see text)

Line 6’s GearBox software was released shortly after the fall
of the Roman Empire, when Europe was in chaos and guitar
amps were hard to find. Well not quite, but it’s a testimony
to Line 6 that their GearBox software has stood the test of
time so well.
POD Farm has a great many similarities to GearBox, as
well as significant differences. There are two versions, POD
Farm (similar to the GearBox Silver bundle) and POD Farm
Platinum, which has every model Line 6 can throw at it,
including the model packs. Also, you can choose to authorize
via iLok, or use Line 6 hardware as a dongle. If you
already have model packs, they’ll port over to POD Farm
when you upgrade.
But first, if you have any Line 6 gear, run the Line 6
Monkey to see if you’re eligible for a free POD Farm
license. For some other Line 6 products, you can get an
update for $49; the iLok version (which doesn’t work in
stand-alone mode—VST/AU/RTAS plug-ins only) runs
$99 for POD Farm and $299 for the Platinum version, but
you can get a 15-day free trial. Visit the Line 6 website
for details.
THE INTER-FACELIFT
Operationally, there are three main differences compared
to GearBox.
· The interface looks much cooler, with a Rolodex-type flip
chooser at the top if you select “Gear” mode. You can also
select from menus, or both—e.g., click on the Delays
menu, and the chooser will flip to the selection of delays,
where you can then flip through the options.
· You now build chains via drag-and-drop into the lower
half of the screen.
· Best of all, you can now assemble two parallel chains.
Before, I had to create a parallel track and insert another
plug-in; this is a lot more convenient.
What hasn’t changed is relatively inflexible routing of
effects—you can’t freely place any effect wherever you
want it. Most situations are covered, though; you can
put up to six effects before an amp (providing the first
one is the Noise Gate, otherwise you’re limited to five).
To help sort this out, when you drag-and-drop a device
into the chain, little arrows show where the effect can
go. If the arrows appear on an existing effect, then
dragging the effect replaces the effect already in that
position. For most applications, the routing issues
won’t be a big deal but for some of my “specialty”
sounds, it’s a limitation.
In addition to the Gear view, you
can show the selected piece of
gear’s panel in the window’s top
half by choosing Panel view. The
knobs are nice and big, making
them far easier to manipulate
onstage compared to GearBox.
Similarly, you can choose to view
Presets, Tuner, or Mixer. From the
latter, you can adjust settings for
Line 6 hardware if you’re in standalone
mode—again, more convenient
than GearBox.
CONCLUSIONS
GearBox with a new skin? Yes, but
that’s only part of it. The Dual Tone
option is a huge deal, and the flip
view can make it easier to find a particular
piece of gear. I also appreciate
being able to run POD Farm without
Line 6 hardware—although I use Line
6 hardware a lot anyway, so I’m
equally glad Tone Direct Monitoring
didn’t go away.
But most importantly, POD Farm
can make some absolutely wonderful
sounds—and that’s the bottom line.
Strengths: Dual Tone option is
great. Flip-style browser is more
than just eye candy. Preserves
existing GearBox presets and
model packs. Free update to many
Line 6 gear owners. Better value
than previous incarnations.
Limitations: Relatively inflexible
effects placement. Non-resizeable
window. No new effects or amp
models compared to what was previously
available.
Don’t be lazy—don’t use the same amp and mic setup for all of your
tracks. Try a different amp, and/or use a different mic for the overdubs—or
both. Did you wax a heavy, dark crunch rhythm tone, and now you want a
bright accent part? Pull down that ribbon mic and stick up a C414 or other
“brighter”-sounding mic, and do your sparkly accent part through that.
I’m also a fan of small amps. I currently own about eight different amps, all
25W RMS or less. It’s not about disturbing neighbors (my studio has great
isolation) but we’re not trying to fill a large club; we’re trying to wax cool
tones. A smaller amp will be less likely to saturate the room and drive it
into acoustic compression, and you can crank it to the point where those
power amp tubes work hard—without deafening everyone. Also, bleed
among players in a multi-player tracking situation is less of an issue.
With mic placement, aiming it on-axis, directly at the center of the
speaker’s dustcap, generally sounds brighter while moving it out to the
edge of the speaker’s surround generally gives a fuller, warmer tone.
Sometimes I like to have the mic a couple inches from the speaker’s edge,
but at about a 45 degree angle so it’s aimed more towards the dustcap;
this gives a fairly balanced sound.
Distance from the source can give distance on the recording. Don’t be
afraid to move one or more of your mics back a foot, or even several feet
from the amp.
For stereo, I often run two different-sounding amps (e.g., a Vox and
Fender) in two different rooms, with each having different types of
mics . . . e.g., C414 on one, Beyer M160 on the other. Of course, watch for
phase cancellation, but feed a bit of stereo effects into a rig like that and
the sound really blossoms. And with a dual amp setup, you can switch
from one sound to another without having to go out and rearrange the
setups—just select the one you want to use for a particular part. Toss in an
EQ pedal (the very inexpensive Danelectro Fish and Chips and the Catalinbread
Varioboost are personal favorites), a compressor, and a few nice
overdrive/distortion/fuzz pedals, and you can get a lot of different sounds
without leaving the control room.
Two more tips: Work those guitar knobs! Many amps, and even dirt
pedals, will respond differently with just a simple twist of the tone and
volume knobs. Also, cocked-and-locked wah pedals are fantastic tools.
Kick the wah on, sweep it until it’s emphasizing a frequency that you find
complementary, then leave it alone and play. —Phil O’Keefe
Peavey Windsor Studio ($499.99)

There are a zillion small guitar amps out there, so why is
Peavey getting the nod for this roundup? Simple: The Windsor
Studio was not only designed with studio applications in
mind (gee, ya think the name gives it away?), but includes
several desirable features that make it unique among amps
for recording guitarists.
TUBES: THE ULTIMATE “TUBE SOUND
PLUG-IN”
The single-channel amp architecture includes a preamp built
around two 12AX7s, and a nominal 15-watt RMS power amp
based on a single-ended EL34 running in Class A mode,
with no negative feedback. However, the Windsor treats the
output tube as a “plug-in”—you can replace the EL34 with a
6L6GC, 5881, KT66, KT77, KT88, EL34, 6550, or KT90 (the
output varies from 10 to 20 watts depending on which tube
you choose). Because the amp was designed from the
ground up for swapping tubes rather than having it be a
“hack,” there’s no need for re-biasing. Furthermore, the
Windsor Studio Hot Rod Tube Pack ($179.99) is available as
an accessory, and contains a collection of output tubes
(KT77, 6L6GC, 6CA7/EL34, KT66, and KT88).
If you’re a fan of ReValver Mk III (Peavey’s softwarebased
amp sim) and messed around with exchanging virtual
output tubes, you know what kind of a difference this
can make to the sound; being able to translate that into
the hardware world is pretty cool. It appears someone at
Peavey can’t tell the difference between hardware and
software . . . and that’s a good thing.
OTHER STUDIO-SPECIFIC FEATURES
Two other features are extremely helpful when a band is
cutting tracks together and you’re trying to minimize leakage.
The first is a passive XLR direct out (with transformer,
which I feel is an important element when trying to get vintage
sounds) that taps directly off the speaker out, and
includes mic emulation. The other is an output attenuator
(Peavey calls it “Power Sponge”) that presents a constant
impedance to the power amp, so you can crank the power
amp up but attenuate the overall level without changing the
basic tone. Changing the amp output level doesn’t affect the
direct out, so you can nail the direct sound first, then work
on the miked sound if you favor the direct+mic approach.
In conjunction with the direct out, this means you can
get a loud amp sound, dial the volume down to where leakage
is minimized, and run a direct signal so that you don’t
have to mic the amp and pick up other instruments. Obviously,
this is also good for doing overdubs in situations
where controlling noise levels is a consideration (and on
stage, you can use this feed for the PA to avoid miking
issues as well as have more control over levels).
There’s also an effects loop, but this one isn’t just for
patching in line-level studio processors (e.g., digital reverb,
vintage compressor, etc.) because the loop return’s input
impedance is 1 Megohm. This makes it compatible with
ancient stomp box effects that want to see the highimpedance
input typical of a tube amp. Note that you could
use this as an auxiliary input that bypasses the preamp
stage entirely, but I wouldn’t advise it as there’s no level
control “downstream” from the loop return.
If the single-channel operation is a concern, the Windsor
does have high- and low-level inputs, and also a Boost button
footswitch that ups the preamp level. However, you
won’t find any MIDI control over any of the amp parameters;
if you want to change settings dynamically throughout a
song, you’ll need to punch or overdub.
Also note that the cabinet is open back, so you can do
the old trick of miking the front and rear of the speaker, and
throwing the rear out of phase.
CONCLUSIONS
The studio bells and whistles wouldn’t mean as much if this
wasn’t such a fine-sounding amp that also works for stage
use. But the Windsor Studio wears both hats convincingly,
and for those who like the characteristics different output
tubes impart to a sound, simply use a different “plug-in”—I
mean, tube. If you’ve been looking for a “little amp” to add
to your roster of studio tools, you can’t do better than this.
It packs a helluva punch in a compact package.
Strengths: Gets high volume sound at low levels. Can swap
output tubes without re-biasing. Emulated mic out. All-tube
amp topology. Effects loop. Switchable speaker impedance.
Includes spring reverb.
Limitations: No parameter control via MIDI.
I used to just reach for an SM57. But one day when my (original Oz-made) Røde NT1 was out on its stand (actually, it’s
always on its stand, socked up, as it’s my favorite for my own voice and acoustic guitar), I put the stand over on its side and
used the pop screen arm to prop the mic up in front of the amp (about 6 inches out, off axis) on my Fender Blues Jr (a single
12" combo amp). I was very surprised by the definition and sense of air—it probably had more room than I was used to,
but it also seemed to capture my tone (as well as the obnoxious Fender self-noise!) better. I’m a clean tone guy and I doubt
the NT1 would work for certain distorted sounds, but for what I typically do, it’s now my first reach. —TK Major
For acoustic guitars, I move a KM-84 around in front of the guitar until I
find the sound I want, which, nearly all the time, is what the guitar sounds
like. Keep the mic away from the sound hole because that’s where all the
bass comes out. While it’s not right for every guitar and every sound, a
small diaphragm cardioid mic at the player’s ear level about a foot out
from his head and pointed downward toward his left knee (reverse for a
left-handed player) often gets a pretty realistic sound. If it’s a contemporary
song with drums and electric instruments, use EQ to cut a lot in the
200–500Hz range. —Mike Rivers
Eventide PitchFactor ($579)

In a previous article, I pointed out
how amp sim software is a real bargain—
for example, the effects in
Waves GTR 3 are based on the same
algorithms used in their big-bucks
bundles. PitchFactor does the same
kind of thing for hardware: Although
pitched (sorry, couldn’t resist!) to guitarists
and priced like a high-end
pedal, it puts Eventide’s Harmonizer
technology into a more affordable
package that’s suitable for more
than just guitar.
GOZINDAS AND
GOZOUTAS
One look at the back panel, and it’s
obvious that this is not your typical
floor pedal. Ins and outs are stereo
(with jacks for each channel, so you can
do mono), and there are switches for
setting input and/or output levels to
line and/or guitar. There’s a class-compliant
USB port for software updates
and MIDI (and maybe someday for
treating the PitchFactor as a “hardware
plug-in” for DAWs?), and jacks
for an optional expression pedal or
footswitch you can tie into the patches.
Incidentally, I highly recommend
using an expression pedal. It not only
controls strategic parameters in the
factory presets, you can program it to
control parameters in your own presets
as well.
I was initially disappointed when I
saw there are “only” ten algorithms.
However, these are like “Eventide’s
Greatest Hits” with intelligent
harmonies (up to four voices),
delayed/pitch shifted sequences,
arpeggios, unison options for thickening,
an extremely groovy “Synth”
algorithm, etc. What’s more, the 11
controls—I’m assuming that’s a coincidence,
not a Spinal Tap reference—
allow for a huge degree of preset
customization when saving into the
100 user presets, which can also be
classified into banks.
The harmonies have that glitchless
“Eventide” quality that sound more
like you double-tracked a guitar to
create a separate harmony line. I fed
it with both clean and highly
distorted signals; the latter was a real
treat, as it gave the equivalent of
polyphonic distortion effects coupled
with harmonization. And although
Eventide cautions that the harmonies
work best with single notes (and they
do), if you hit another note accidentally,
or even hit a chord, the sound
doesn’t turn to glitchy garbage but
remains relatively clean, even though
the harmonies aren’t well-defined.
That’s a big deal.
For harmonies, you do need to
specify a scale and key; this isn’t like
the DigiTech or TC boxes that “listen”
to your instrument and derive harmonies
from that. I don’t consider
this a problem, though, because a
“Learn” function can analyze a chord
you play, tell you the key you’re
playing in, and create the appropriate
harmony notes.
You should also know this is a deep
box—far deeper than we have space to
explore here. There’s extensive MIDI
control (via 5-pin DIN connectors or
over USB) if you want to automate
changes with a sequencer; PitchFactor
recognizes pitchbend, continuous controllers,
program changes, and MIDI
tempo sync, although you can also do
tap tempo. The three footswitch buttons
also provide functionality beyond
bypass in/out, and just a slight turn of
one knob can put you in a whole different
sonic space. Even the documentation
is good, which will be appreciated
by anyone who wants to get the most
out of this box.
CONCLUSIONS
It was almost a year ago that we ran
a roundup on “Studio Meets
Stage”—gear that’s equally at home
in both environments. Had
PitchFactor been available at that
time, it would have been an ideal
candidate. I even tried using it as a
DAW external effect for processing
existing tracks, and in terms of
sound quality, it was definitely up to
the task.
Granted, PitchFactor is no match
for something like Eventide’s Eclipse
processor—but the MSRP is about
20% as much. If all you really crave
is a roster of Eventide’s best Harmonizer-
related effects, PitchFactor will
save you enough money compared
to Eclipse for a decent vacation . . .
or at least, a really good sushi dinner
for two, every week for a year!
Strengths: Truly cool, innovative
sounds. Suitable for a wide variety of
signal sources. Eventide sound without
the price tag. Extremely deep
and flexible for tweakheads—or you
can just dial up presets. MIDI control.
USB port for software updates and
MIDI over USB.
Limitations: Requires key and scale
settings to produce accurate
harmonies. Audio I/O jacks on back,
not side.
I second the idea that “an SM57 isn’t everything.” A Neumann U67,
Sennheiser 409 or 421, and other mics do really well. If you like the White
Album or old Bowie, you like the U67. —Bill Plummer
EQ has been on top of guitar-oriented recording, so many current products were already reviewed when they first came out. However, some have had updates—check ’em out.
Waves GTR Solo: The program is now available free for one year; if you prefer, you can buy a permanent license for $140, or a bundle with “21st Century Guitarist,” an interactive DVD/eBook by yours truly (with session files, software, text, and an audio host program) for $165.
Peavey ReValver Mk III: Originally introduced in VST/AU for Mac and VST for Windows, this 64-bit amp sim program is now available in RTAS for both Mac and Windows. Current ReValver Mk III owners can download the RTAS version for free from www.peavey.com/products/revalver/index.cfm, where you’ll also find demo versions.
Native Instruments Guitar Rig 3: On the Native Instruments forums, several people have reported using Guitar Rig 3 with Atom-based Netbooks—and getting decent performance.
IK Multimedia: AmpliTube Fender is the latest IK “powered by AmpliTube” product, and suffice it to say that Fender endorses it for a reason: The collection really does sound like Fender amps. Also, IK is co-sponsoring a series of Guitar Recording Master Classes. Check IK’s home page for the schedule, including streaming events on the web if you can’t make it to the events themselves.
Ableton Live 8: Live 8 adds an “Overdrive” effect that clearly zeroes in on guitarists, along with a Looper effect—while not guitar-specific, it’s mostly guitarists who have embraced looping technology for building up phrases using live overdubbing.
Cakewalk Sonar Home Studio 7XL: The XL version includes Studio Devil VGA+, a guitar/bass amp sim with multiple cabinets, amps, and effects.
ADDITIONAL RECORDING TIPS
Here’s a trick Richard Dodd trick used on Tom Petty’s guitars: In addition to your regular mic, tape a PZM to the cab for a “bump” in size. It works!
- When you like the sound you’ve recorded but need some room sound after the fact, re-amp with a different amp at a distance. Now your far mic is a whole different sound—maybe overdriven and loud, while your close mic is tight and controlled.
- Open the door, and put your distant mic round the corner in the other room. Worked for Pagey, and Blackmore too.
- Use painter’s tape to tape up the unused strings when the part needs to be really tight.
- When re-amping, automate your send to the amp to simulate the guitarist working the guitar’s volume control for different volume and overdrive levels.
- Use your DI to drive an amp sim set for a 60s fuzz sound. Blend that just under the natural amp tone for lead parts—BIG!
–Lee Knight
AMP SIM TECHNIQUES
- Put EQ before distortion so you can choose which frequencies get distorted and which ones don’t, then put EQ after distortion to fine-tune the sound.
- Some amp sims have the opposite of a “magic” frequency—an “annoying” frequency. Using a parametric to find this and cut it.
- When trying to pick a cab, try all cabs first, and pick the one you like best. Next, go through the various virtual mic options, and pick the one you like best. Then, check out the various miking options (front, angled, distant) and pick a favorite. Finally, go back and run through all the cabs again. If you have the sound you want, great. If you find a better cab, use that and run through the various virtual miking options again.
- After recording your guitar track, run it through Adobe Audition’s click and pop remover set for a fairly aggressive amount of removal. This softens the “spikiness” and makes the sound creamier.
- I use hex outputs with splits to tailor the sound separately for the low and high strings. For example, the top three might have more overdrive and some echo, while the lower three have a “beefier,” chunky type of sound. Because all hex outs have some degree of crosstalk, the two splits sound more convincing than a hard split.
- Presets seem to be created by people who pick softly. I need to pull back the gain or drive controls on virtually all amp sims because I use 0.010 high E and hit hard.
You don’t always have to play notes on a guitar. It’s a very cool percussion instrument, which becomes cooler with the right processing.
–Craig Anderton
LINKS
Here are the links for manufacturers mentioned
in this roundup.
Ableton www.ableton.com
AEA www.ribbonmics.com
AKG www.akg.com
Audio-Technica www.audio-technica.com
Audix www.audixusa.com
Beyer Dynamic www.beyerdynamic.com
Cakewalk www.cakewalk.com
Catalinbread www.catalinbread.com
Danelectro www.danelectro.com
Digidesign www.digidesign.com
Eventide www.eventide.com
Fender www.fender.com
Groove Tubes www.groovetubes.com
Heil Sound www.heilsound.com
IK Multimedia www.ikmultimedia.com
iZotope www.izotope.com
Lawson www.lawsonmicrophones.com
Line 6 www.line6.com
M-Audio www.m-audio.com
Native Instruments www.native-instruments.com
Neumann www.neumann.com
Peavey www.peavey.com
Radial Engineering www.radialeng.com
RealTraps www.realtraps.com
Røde www.rodemic.com
Roland www.rolandus.com
Royer www.royerlabs.com
Sennheiser www.sennheiser.com
Shure www.shure.com
Sonic Core www.soniccore.com
Vox www.voxamps.com
Waves www.waves.com